How to set up a roller banner
Setting up and packing down a pull-up banner in the right order, choosing a cartridge for how often you use it, and the mistakes that damage stands.
Last updated
How to set up a roller banner takes about a minute once you know the order: open the feet, build the pole, slot it into the base, then pull the graphic up slowly and hook the top rail on. Packing down is the same in reverse, with one rule that matters more than any other: never let the graphic spring back into the base on its own. This guide walks through both, plus the mistakes that damage stands and prints.
The parts of a roller banner stand #
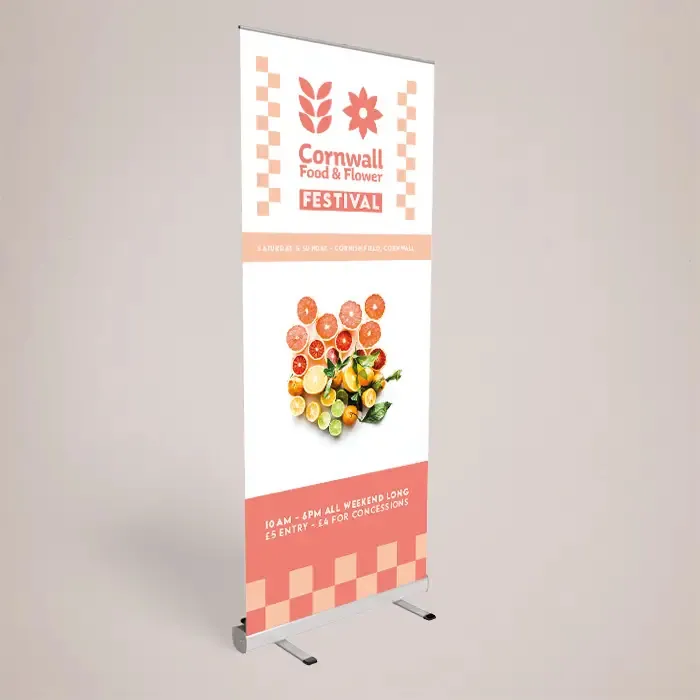
It helps to know the parts before you learn how to set up a roller banner. Every roller banner we sell is a printed graphic rolled onto a sprung roller inside a base, often called the cassette or cartridge. You choose the cartridge when you order roller banners: Budget, Standard Plus or Premium. The steps below are the same for all three, but the details of the feet, pole and top rail vary from stand to stand, so follow any leaflet that comes with yours.
- The base (cartridge). Holds the rolled graphic under spring tension. The bottom of the graphic is fixed inside it.
- The feet. Swing or twist out from under the base to stop the banner tipping.
- The pole. Usually two or three sections that push or click together, then slot into a hole in the base.
- The top rail. A bar clipped along the top edge of the graphic. It hooks onto the top of the pole.
Our graphics are 2000 mm tall in widths of 800, 850, 1000, 1200 and 1500 mm, printed on 440gsm banner vinyl or 610gsm blockout PVC. Check the ceiling before the day: a 2000 mm banner needs a little over 2 m of clear height once it is up.
How to set up a roller banner step by step #
How to set up a roller banner safely: pick the spot
Pick a flat, level spot first. Carpet tiles, hall floors and reception flooring are all fine; a sloping car park or soft grass is not, because the banner will lean and can blow over. Keep it clear of fire exits and walkways too, and away from the edge of a table where it can be knocked.
The steps
- Lay the base down flat. Put the base on the floor with the graphic slot facing up. Check which side is the front before you do anything else, so the print faces your visitors.
- Open the feet. Swing or twist the feet out fully until they lock or stop. A banner standing on half-open feet is the usual reason one falls over.
- Build the pole. Join the pole sections so they sit fully home. If they are linked by an elastic cord, let the sections pull together rather than forcing them.
- Fit the pole into the base. Push the bottom of the pole into its hole at the back of the base so it stands upright on its own.
- Lift the graphic slowly. Hold the top rail with both hands, one near each end, and pull it straight up in one smooth movement. Keep it level so the print rolls off evenly.
- Hook the rail onto the pole. Slot the hook or cap on the top of the pole into the rail. Only let go once the rail is fully seated and the pole is holding the weight.
- Check it from the front. Step back a few metres. The graphic should hang flat and straight, with the pole hidden behind it. A slight curl at the edges on the first outing usually settles as the print relaxes.
About adjusting the height
Some stands have a pole that telescopes so the graphic can sit a little lower. Do not assume yours does: the graphic is printed at 2000 mm and is designed to be shown at full height. If the pole is too long for the print, the rail cannot be hooked on without pulling the graphic off its roller, which strains the spring.
How to take a roller banner down without damaging it #
Packing down is where most roller banners get hurt. The roller inside the base is sprung, and if you unhook the rail and let go, the graphic shoots back into the base. That can tear the print where it joins the roller, scratch the surface, jam the mechanism or catch someone’s fingers.
- Hold the top rail with both hands and lift it gently off the pole.
- Walk the rail down slowly, keeping it level, and let the spring take the graphic in at your pace.
- Stop with the rail sitting on the base. Do not let go early, even for the last few centimetres.
- Take the pole out, separate the sections and fold the feet away.
Before rolling it back in, wipe off any dust or drink splashes with a soft damp cloth and let it dry. Rolling a dirty or damp graphic into the base presses the dirt into the print. Our guide to cleaning a PVC banner covers what is safe to use.
Common mistakes and how to avoid them #
Most damage happens in the first few outings, before the routine is second nature. If you are showing a colleague how to set up a roller banner, walk them through this table too.
| Mistake | What happens | Do this instead |
|---|---|---|
| Letting go of the rail when packing down | The graphic snaps back and can tear or crease | Walk it down with both hands every time |
| Feet not fully open | The banner tips when someone brushes past | Open them until they stop, and check before lifting the graphic |
| Pulling the graphic up at an angle | The print rolls off unevenly and can crease along one edge | Lift straight up, hands at each end of the rail |
| Standing it by an open door or outside | Even a light breeze catches a 2 m surface | Keep roller banners indoors or in sheltered spots |
| Standing it in front of a bright window | Light shows through and the print looks washed out | Use blockout roller banners, printed on 610gsm blockout PVC |
Choosing a cartridge for how often you set up #
If you are still deciding which roller banner to buy, think about how often it will go up and down. A Budget cartridge suits occasional use, such as a one-off event or a banner that stays in one reception. Standard Plus is sturdier for regular use. The Premium cartridge is the one to choose if you set up and pack down often, at exhibitions and roadshows. Our roller banner buying guide compares sizes and materials in more detail.
Whether a carry bag comes with the stand depends on the cartridge, so ask us before ordering if you need one.
Transport, storage and replacing the graphic #
Once you know how to set up a roller banner, looking after it between events is simple. Keep the graphic rolled inside the base, lay the whole unit flat in the car rather than standing it on end, and store it somewhere dry and at room temperature. A damp garage or a hot car boot in summer can make the print curl. Our guide on how to store banners has more on this.
We do not list replacement roller banner graphics on their own; each roller banner is sold as a printed graphic with its stand. If you want a new design for a stand you already own, contact us first and we will tell you honestly whether it is practical.
Still not sure? #
If you are planning a stand with several banners side by side, need one by a set date, or have a question about how to set up a roller banner you already own, call 0161 315 1151. Our standard roller banners dispatch in 4 working days after your order and artwork are confirmed (2 on express, 6 on saver), and every product page shows the exact days for each option. For general advice on packing equipment for events, the HSE’s guidance on manual handling is a sensible read if you carry several stands at once.